[Mini-ITX}] AMD A6-3500 build in Techsolo 2200 case
#1
Hi all,

Decided after lurking for quite some time to take the step and build my first HTPC. This thread is about my build attempt and progress. What I do hope to receive is feedback, comments hints and tips on this build. What you get is loads of picas of my progress.

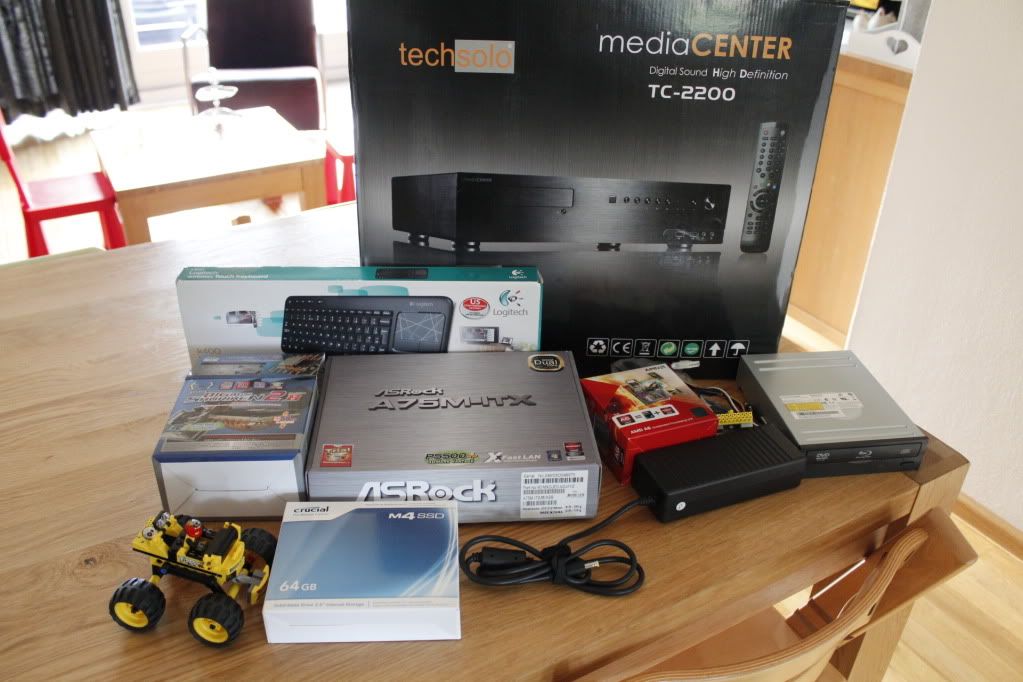
Components I plan to use:

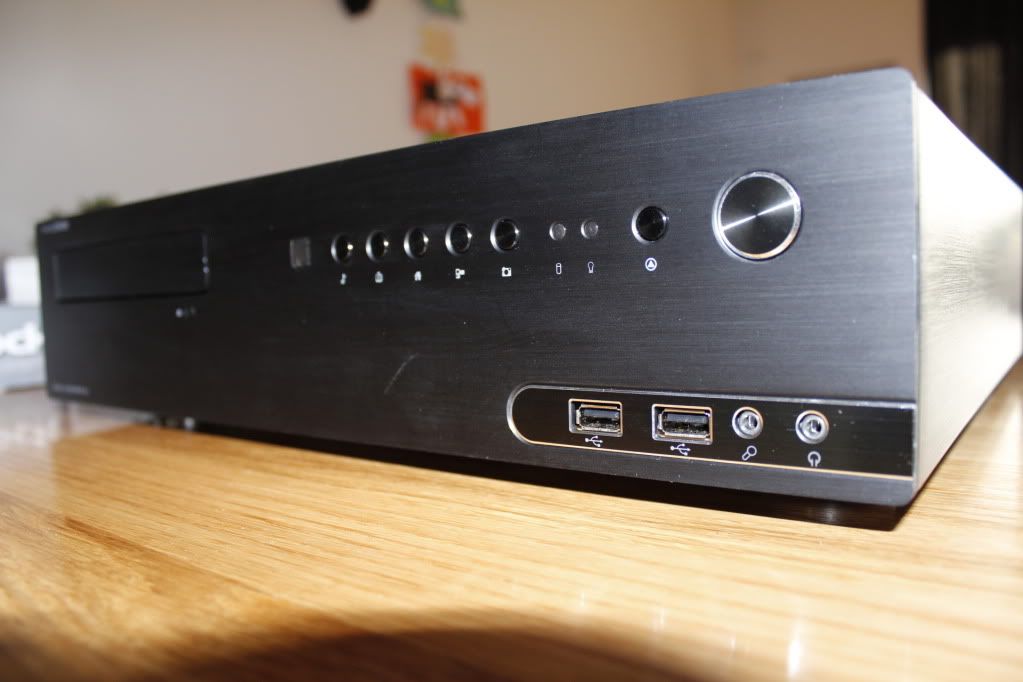
Case: Techsolo 2200 case, also know in Europe as the MS-tech 2200 and in the UK as Novatech Vision. Chose this case as I like the formfactor and it is just as wide as all hifi components.

MB: AS Rock A75 M-ITX

PSU: Pico PSU 120 w with 120w powera adapter

Mem: Kingston Hyper X 1600 Genesis 2 x 2 GB modules

SDD: Crucial M4 64 GB

BD DVD CD ROM; Lite EON

Keyboard: Logitech k400

Aftermarket CPU cooler: Scythe Big Shuriken rev 2

CPU: AMD A6-3500

Image

All stuff for my new toy and our youngest wanted his toy on this pic aswell.

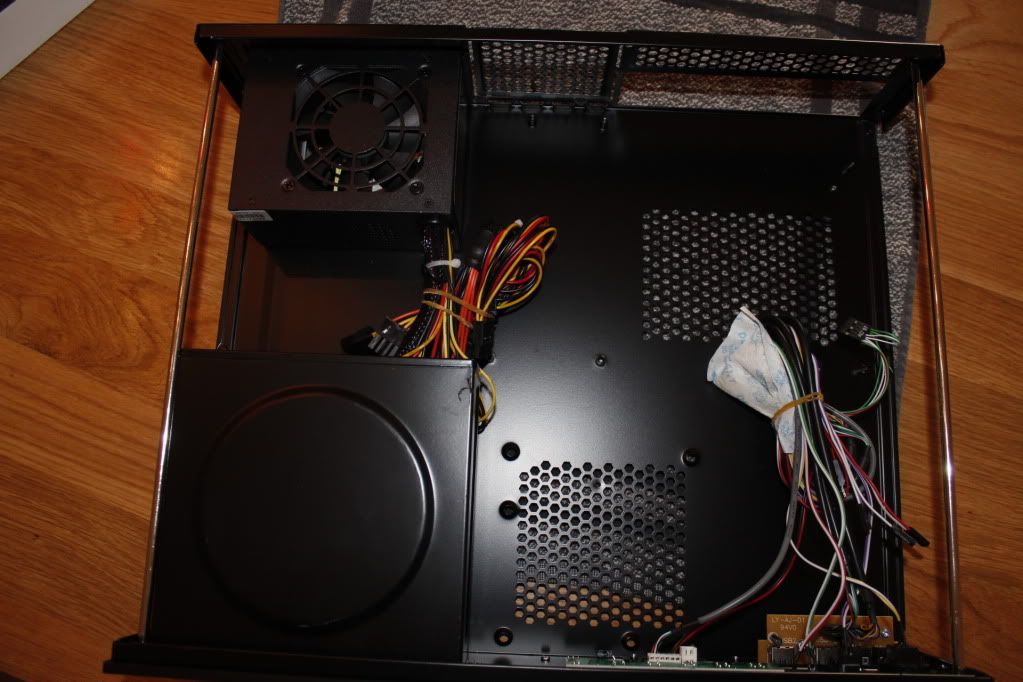
Pics of the case, just in case you did not know it yet.
Image

Image
Inside the case, using the pico psu, I can get rid of the PSU that is in there.

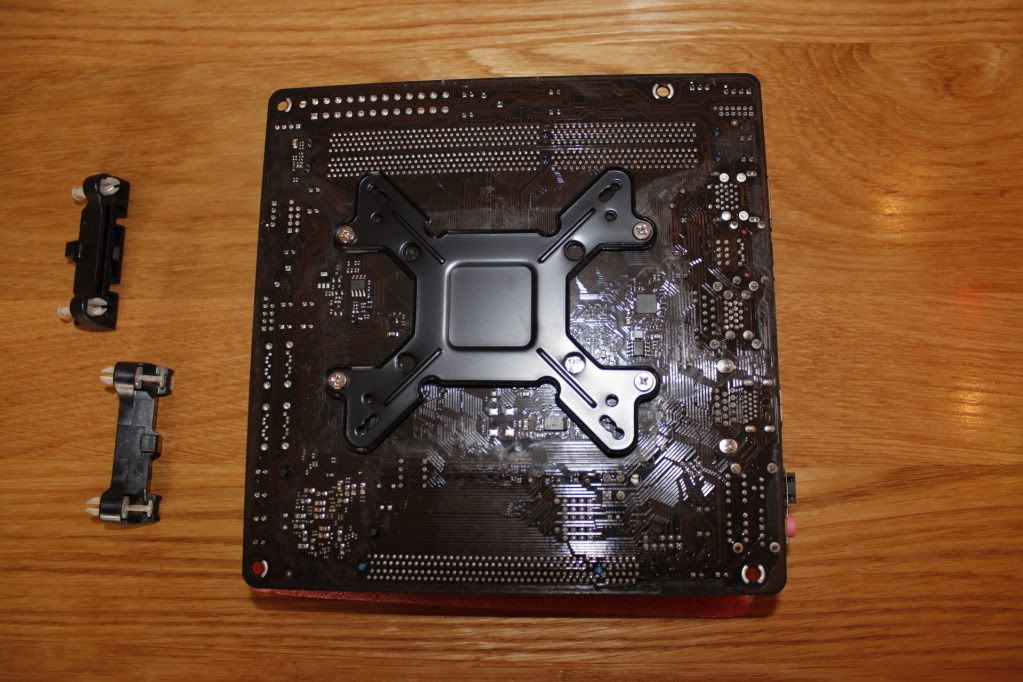
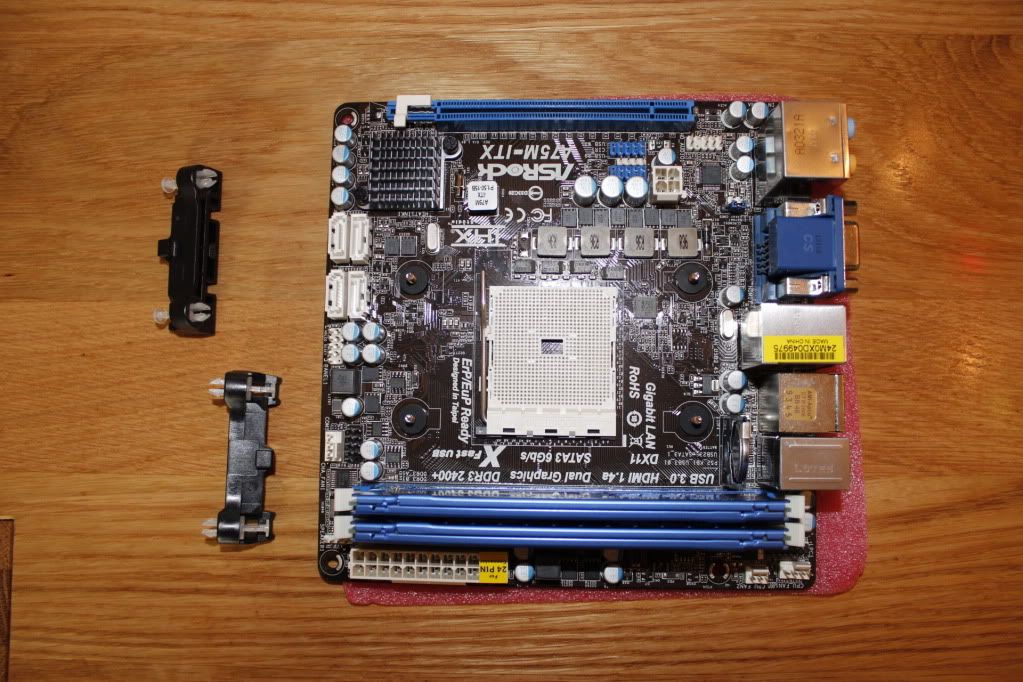
Motherboard with the brackets removed.
Image

Backplate of Big Shuriken installed.

Image

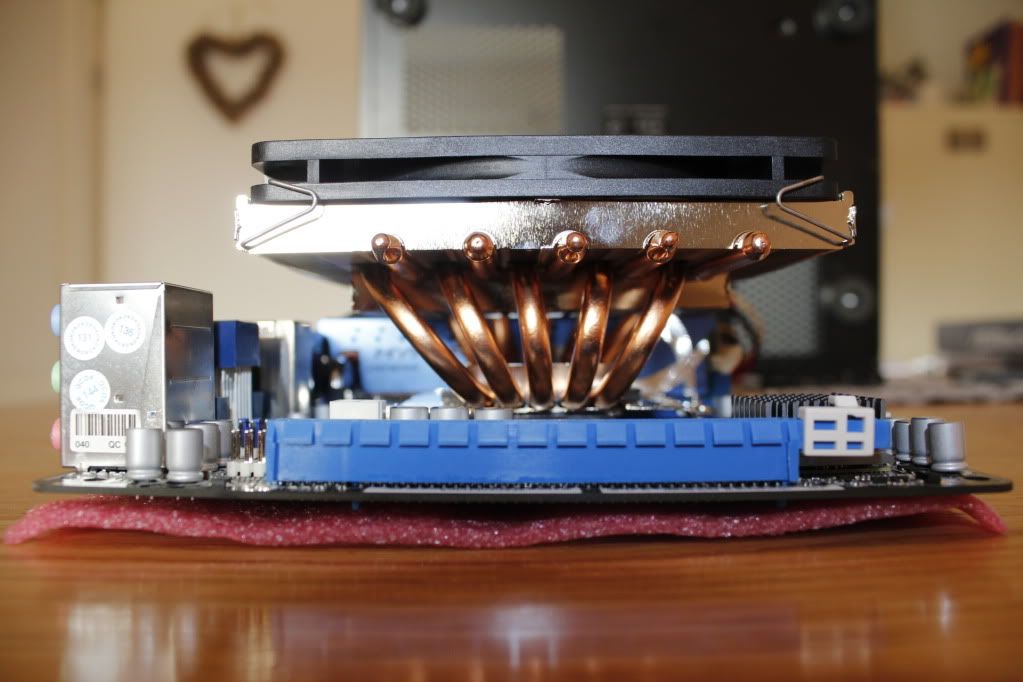
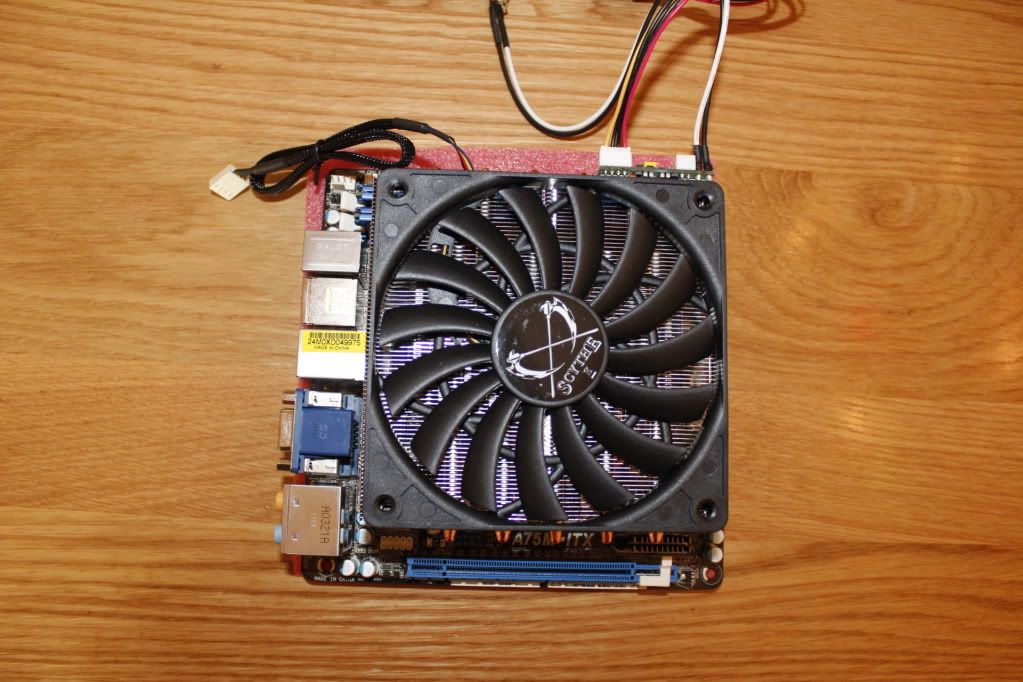
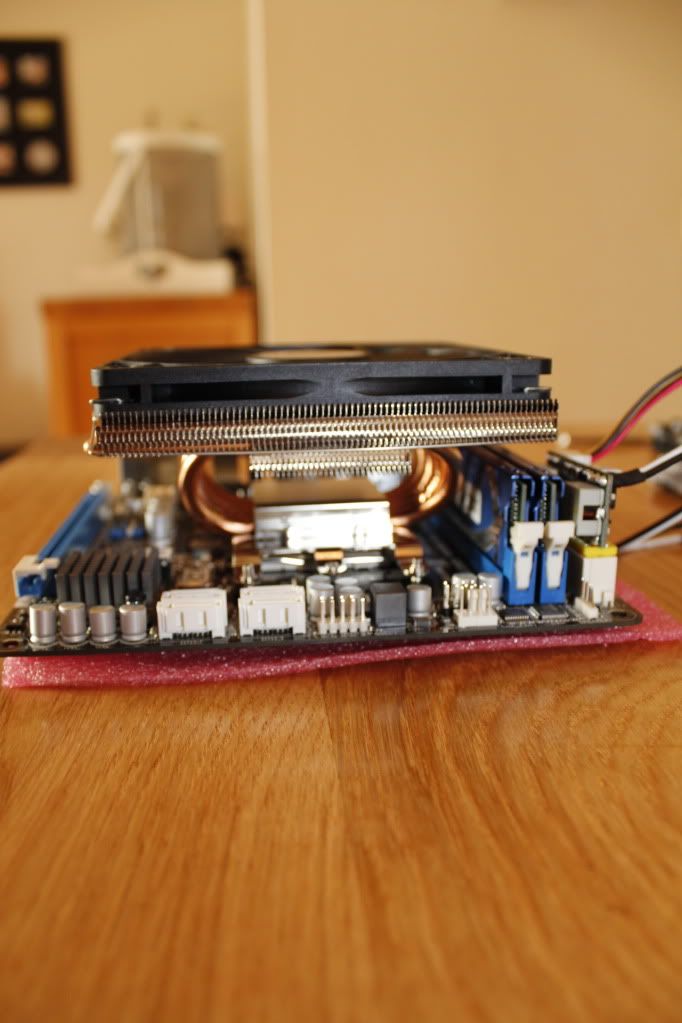
CPU, paste and Big shuriken installed. First I placed the memory and just to be sure the Pico PSU.
Image


Reply
#2
Looking forward to the pics. Good Luck and enjoy!
Reply
#3
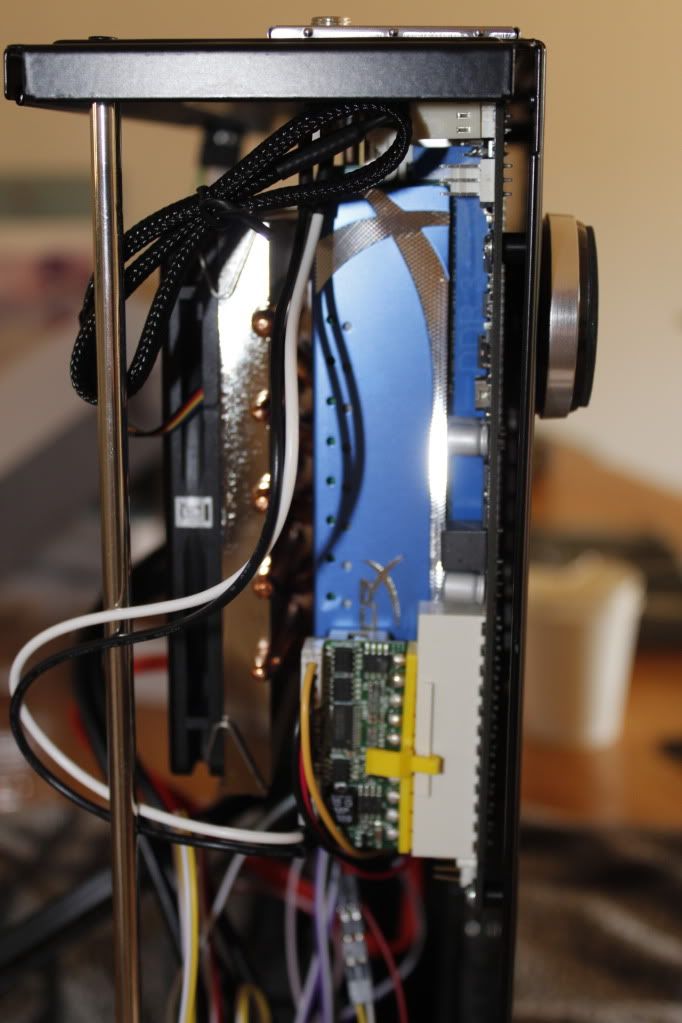
Not too sharp pic from the side with clearance of the memory and pico psu in place.

Image

Other side:

Image

SSD connected to bottom of the case, no bracket needed and potential still space left for 3.5 inch harddisk.

Image

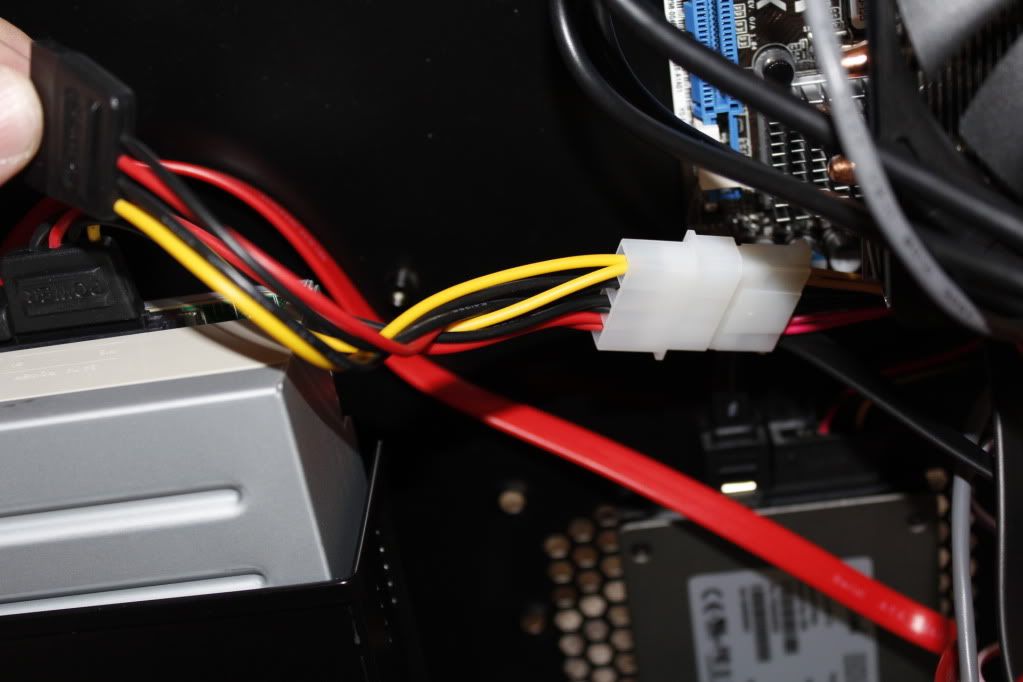
Bought me a MOLEX to 2 x sata power splitter making a total of three sata power connections. Should be enough for BD rom, SSD and potentially a 3.5 inch HDD.

Image

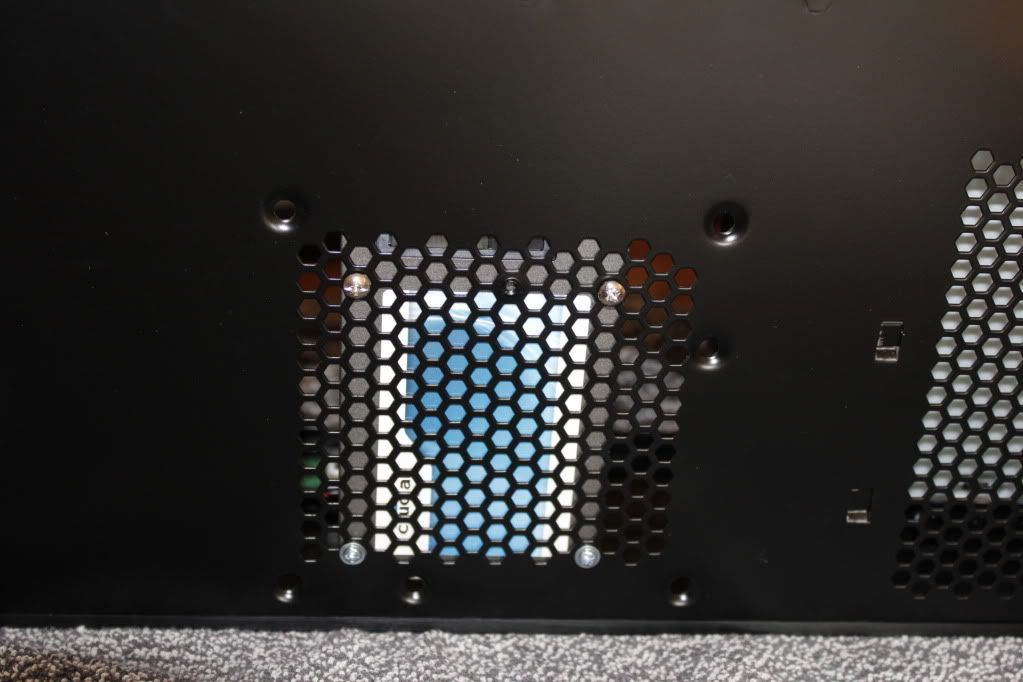
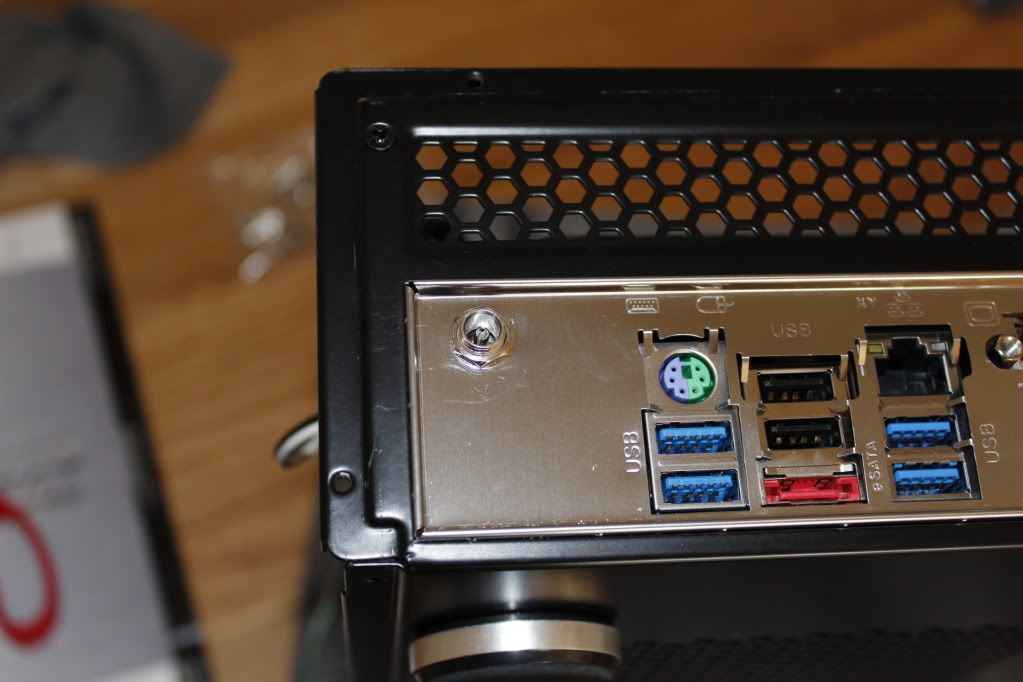
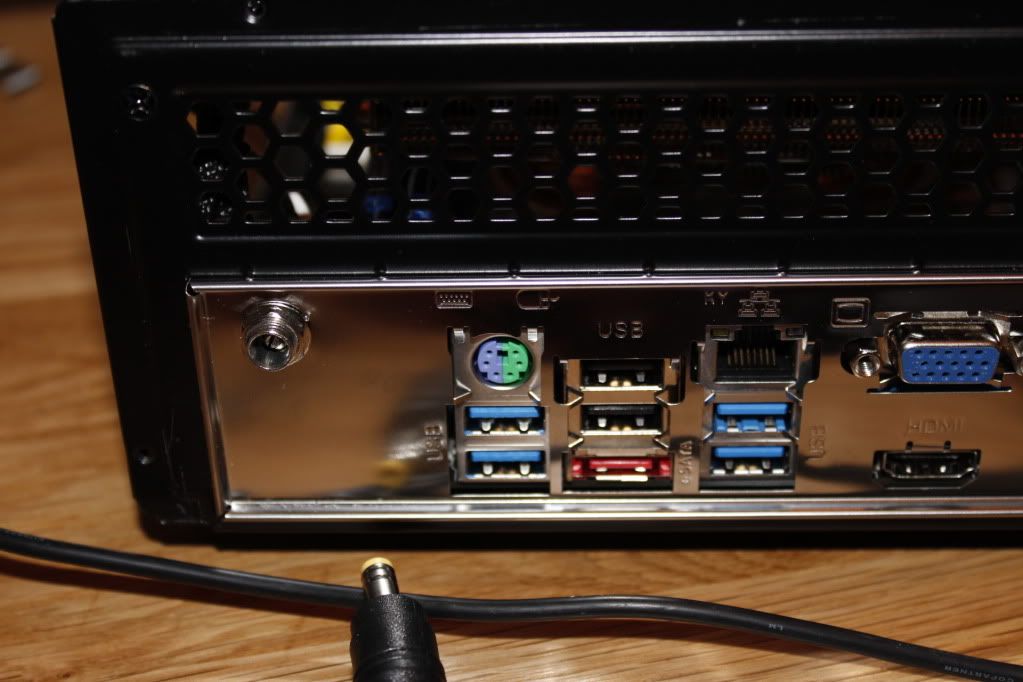
Due to the shortness of the Pico PSU to adapter connection I drilled a hole in the backplate to fit it in. Do not know if this is okay?

Image

Cables from psu from the side.

Image
Reply
#4
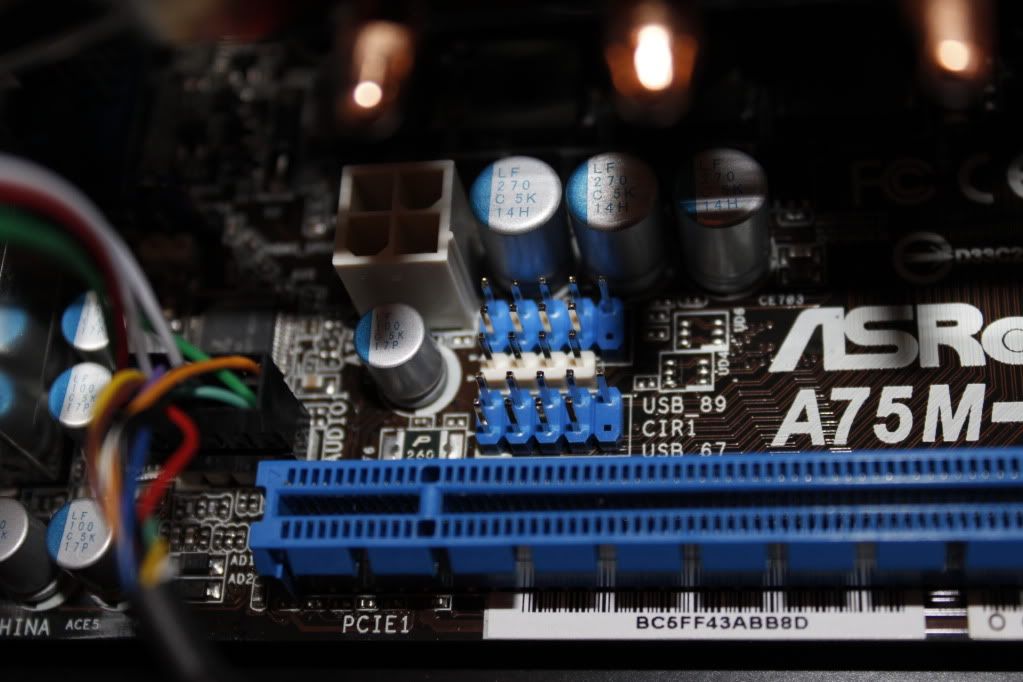
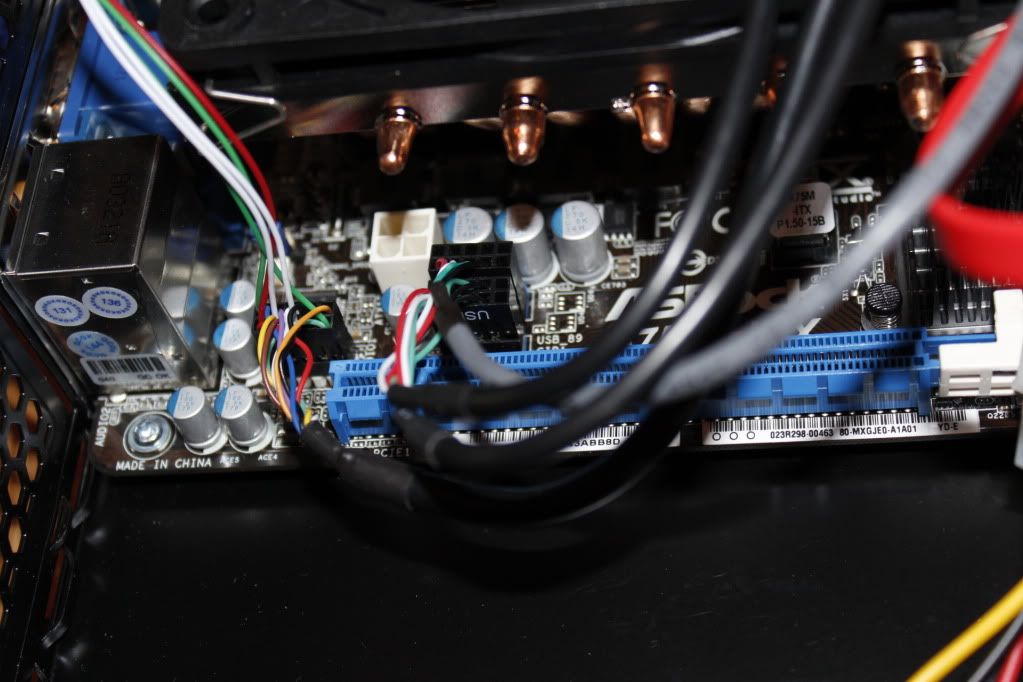
Pic of the USB 2.0 and CIR header.

I connected the cables from the case to these headers as there is a IR receiver build in the case already, theoretically it acts as a USB keyboard so I can start up the HTPC with the remote. Hope I did this right?

Image

According to the manual the grey cable connector is supposed to be placed, partly on the blue pins of the USB header and partly on the white CIR header. Hope I did this right? AnyoneHuh?

Image

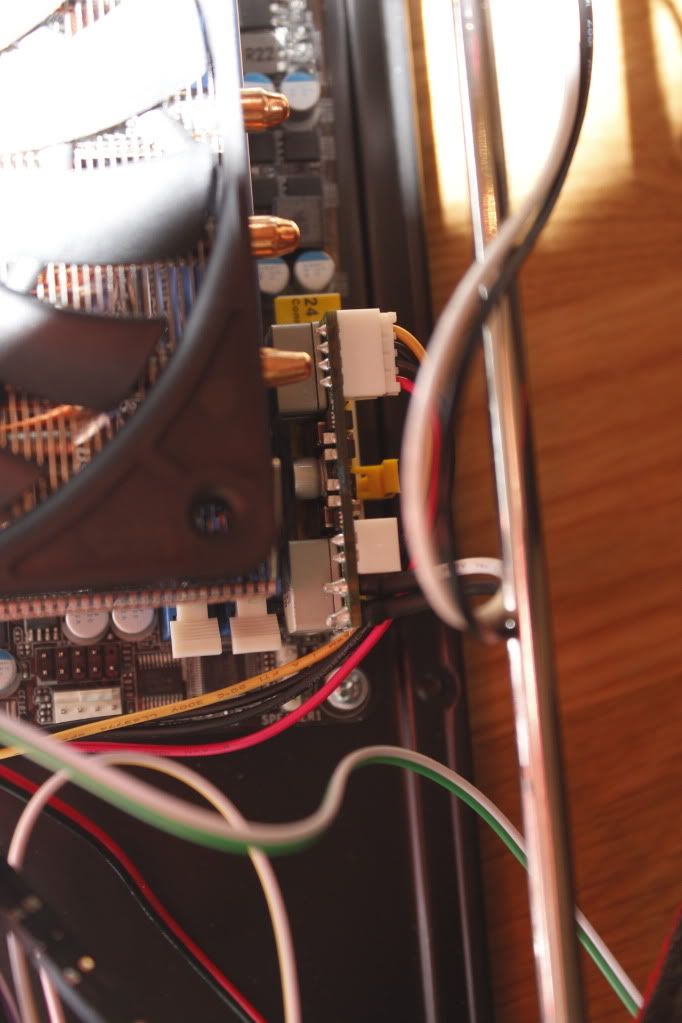
Pico PSU connected to the 24 pin connector of the motherboard. Have 4 pins left, is that for ATX feedHuh?

Image

Back plate with customised Pico PSU connector.

Image
Connected and installed everything in the case and connected monitor and wireless keyboard to this project. Powered up and saw the CPU fan rotating but no startup on screen, screen stayed blank. Case does not have speaker so I cannot listen to POST signals.

I do not understand what can be wrong. Could use some help here?
Reply
#5
It look like from all your pictures you have not plugged in the P4 CPU power connector. It's the little 4-pin plug right next to the CPU under the heatsink. Without that plugged in, the CPU has no power and you'll get the behavior you are describing.

Image

The picoPSU 120 doesn't have such a connector so you'll need a molex splitter and a molex-to-P4 adapter.
Reply
#6
Thanks Dougie, did not think of that, uhmmmmm duh. Seeing that I already have a molex to 2 x sata power splitter, can I safely buy the molex splitter and the molex to p4 adapter. Put the molex splitter between the PicoPsu and the molex to 2x sata power splitter without problems.

Just to be sure.
Reply
#7
When I've done this in the past I used:

SATA male to 2 SATA splitter (plugged into picoPSU SATA power)
http://www.monoprice.com/products/produc...1&format=2

MOLEX to 1 MOLEX + 1 SATA splitter (plugged into picoPSU molex power)
http://www.monoprice.com/products/produc...1&format=2

MOLEX to P4 (plugged into MOLEX+SATA spliter)
http://www.monoprice.com/products/produc...1&format=2

That gives you 3 SATA power connections and 1 P4 power connectons but with only 2 splitters and 1 adapter.

Welcome to the world of picoPSU!

Reply
#8
Dougie, looking at your sig it brings me to the following. Having removed the standard PSU, I have a big hole in the back SFX size, I see you sell PSU plates. Plate itself costs 10 dollars, shipping abroad 16,75 dollars? Or is it a total of 16,75 dollars for one piece. My English is not that good but 27 dollars, humm wish I could find them on this side of the pond. Good idea to close it up though.
Reply
#9
(2012-08-31, 21:10)Takkiedroid Wrote: Dougie, looking at your sig it brings me to the following. Having removed the standard PSU, I have a big hole in the back SFX size, I see you sell PSU plates. Plate itself costs 10 dollars, shipping abroad 16,75 dollars? Or is it a total of 16,75 dollars for one piece. My English is not that good but 27 dollars, humm wish I could find them on this side of the pond. Good idea to close it up though.
Here is a Pico plate for SFX- Pico > SFX / MicroATX PSU Adapter Aluminium With Screws......

The A6 look good....you'll enjoy it!

>Alienware X51- do it all HTPC
>Simplify XBMC configurations
>HOW-TO Bitstreaming using XBMC
I refused to watch movie without bitstreaming HD audio!
Reply
#10
27 dollars, I'd just find a spare piece of metal or plastic laying around and cut it to fit the opening. Hell, a few strips of duct tape even!
HTPC 1 - AMD A8-3870K, ASRock A75M, Silverstone ML03B, Kingston HyperX 4GB DDR3 1866, Crucial M4 64GB SSD
HTPC 2 - HP Stream Mini, 6GB Ram
unRAID 6 Server - Intel Celeron G1610, 20TB Storage

Reply
#11
(2012-08-31, 21:36)Mick1152 Wrote: 27 dollars, I'd just find a spare piece of metal or plastic laying around and cut it to fit the opening. Hell, a few strips of duct tape even!
Or leave it open for better air flow....Big Grin

If it is in the entertainment center or cabinet, you'll never see it.....Big Grin

>Alienware X51- do it all HTPC
>Simplify XBMC configurations
>HOW-TO Bitstreaming using XBMC
I refused to watch movie without bitstreaming HD audio!
Reply
#12
You dont need to connect to the cir header...
The ir receiver in that case connects with usb
Reply
#13
Thank you Skank and all others for the replies and tips. Project on hold untill I get some more cabling in the mail.

So I can put it normally on the usb header.
Okay will try that.


(2012-08-31, 21:48)bluray Wrote:
(2012-08-31, 21:36)Mick1152 Wrote: 27 dollars, I'd just find a spare piece of metal or plastic laying around and cut it to fit the opening. Hell, a few strips of duct tape even!
Or leave it open for better air flow....Big Grin

If it is in the entertainment center or cabinet, you'll never see it.....Big Grin

I do not know much about airflow, atm my scythe is blowing air onto the cpu and the rest of the board, that's it. Because of the missing (read: forgot to order them) cables I cannot check temps. I can iamgine that air will be sucked it via a way that has the least resistance. Hence the big hole where ther used to be a PSU. Dust will follow,should I cover it up with nylon ot otherm material?
Reply
#14
(2012-09-01, 19:27)Takkiedroid Wrote: Thank you Skank and all others for the replies and tips. Project on hold untill I get some more cabling in the mail.

So I can put it normally on the usb header.
Okay will try that.


(2012-08-31, 21:48)bluray Wrote:
(2012-08-31, 21:36)Mick1152 Wrote: 27 dollars, I'd just find a spare piece of metal or plastic laying around and cut it to fit the opening. Hell, a few strips of duct tape even!
Or leave it open for better air flow....Big Grin

If it is in the entertainment center or cabinet, you'll never see it.....Big Grin

I do not know much about airflow, atm my scythe is blowing air onto the cpu and the rest of the board, that's it. Because of the missing (read: forgot to order them) cables I cannot check temps. I can iamgine that air will be sucked it via a way that has the least resistance. Hence the big hole where ther used to be a PSU. Dust will follow,should I cover it up with nylon ot otherm material?
The more holes/spaces for hot air to escape and draw cold air in the better the air flow.....if you don't mind a hole in the rear, I would keep it open.....without hole in the rear, the dust still going to get inside the case through vent holes.....unless, you install dust filter-
NEW! High Quality Magnetic PC Computer Case Fan Dust Filter 120mm

>Alienware X51- do it all HTPC
>Simplify XBMC configurations
>HOW-TO Bitstreaming using XBMC
I refused to watch movie without bitstreaming HD audio!
Reply
#15
About connecting the ir panel
You should do it like this
Image
Reply

Logout Mark Read Team Forum Stats Members Help
[Mini-ITX}] AMD A6-3500 build in Techsolo 2200 case0